Channeling is water finding the path of least resistance through the coffee puck instead of flowing evenly through all of it. The water punches through one weak spot — a crack, a void, a thin patch of grounds near the basket wall — and the rest of the puck stays comparatively untouched. The result is a shot that extracts unevenly: some of the coffee is over-extracted and harsh, some is under-extracted and sour, and the whole thing tastes muddled in a way no grind adjustment seems to fix.
Puck prep is the set of steps between grinding and locking the portafilter into the machine, and it exists specifically to prevent channeling. Almost every channeling problem traces back to one of a handful of prep mistakes. The format below is a symptom-first troubleshooting guide: find what you are seeing or tasting, match it to a likely cause, then apply the fix.
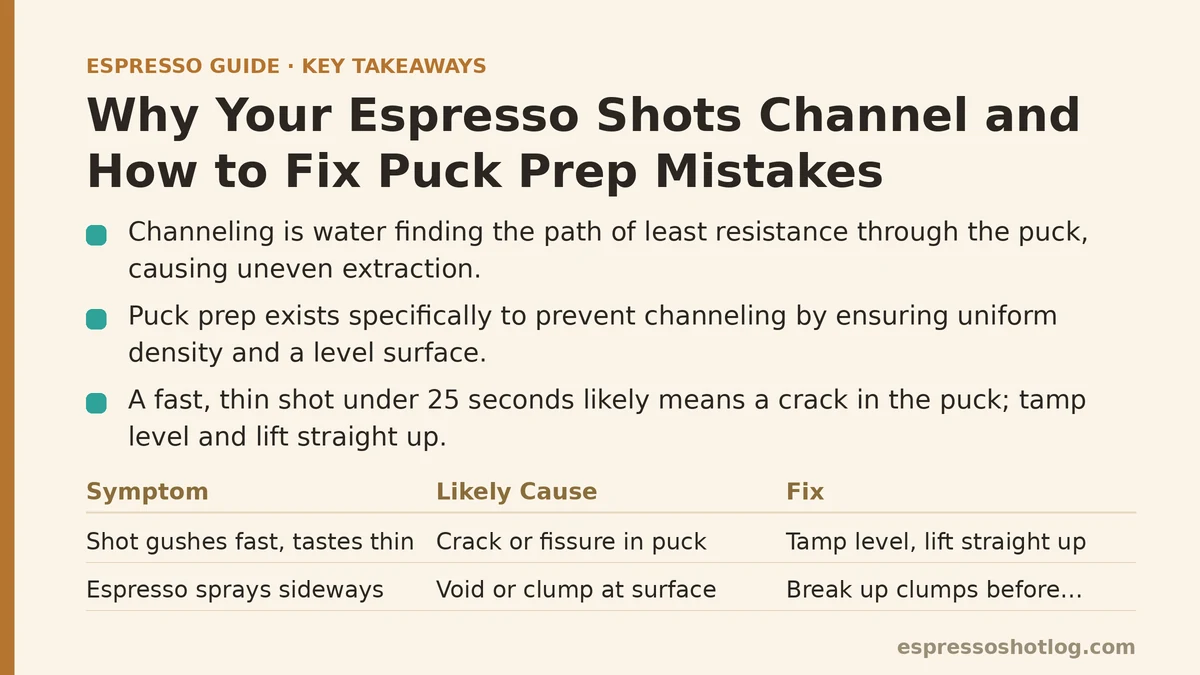
The Basic Mechanism, Briefly
Water under pressure will always take the easiest route. If the puck has uniform density and a level surface, water distributes evenly and extraction happens at a consistent rate. If density is uneven — one side denser than the other, a clump of grounds here, a gap there — water concentrates wherever the resistance is lowest. That spot extracts fast and hard while the surrounding coffee lags behind.
This is why channeling produces the confusing sour-and-bitter combination. It is not one failure; it is two failures in the same shot.
Symptom: Shot Gushes Fast and Tastes Thin
What you see: the flow starts almost immediately, runs pale and light, and hits your target yield well under 25 seconds. The cup tastes watery, with a sharp, almost sour edge.
Likely cause: a crack or fissure in the puck. When you lift the tamper, the puck can spring back or split, especially if the coffee is very fresh (lots of trapped CO₂), if the grind is too fine for the dose, or if the tamper was lifted at an angle and pulled a small gap in the surface.
The fixes, in order of likelihood:
- Tamp level, then lift straight up. An angled lift drags the edge of the puck and opens a crack against the basket wall. Rest the tamper flat and remove it vertically.
- Give freshly roasted beans a short rest. Coffee roasted within the last two to five days releases CO₂ aggressively and creates pucks that want to fracture. It is not a flaw — just too fresh for stable espresso. Some coffees behave better after a week of resting.
- Check that the dose matches the basket. An underfilled basket leaves the top of the puck loose and unsupported, which cracks easily under water pressure.
Symptom: Tiny Spouts of Espresso Spray Sideways
What you see: rather than a clean stream from the spout, the espresso jets out sideways or in multiple thin directions, sometimes spattering up toward the group head. On a bottomless portafilter this shows as obvious spritzers.
Likely cause: a significant void or entry point at the surface — usually a clump of grounds that never got broken up, or a spot where the tamper did not reach because the surface was uneven to begin with.
The fixes:
- Break up clumps before tamping. Ground coffee leaves the burrs in clusters. A quick stir with a distribution tool, paperclip, or dosing needle across the full depth of the basket breaks these apart. You are aiming for a loose, even, fluffy bed — not a compacted one.
- Tamp through the full depth. If the tamper meets resistance unevenly, the surface was already uneven. Level the bed first, then tamp.
- Do not skip the distribution step when using light roasts. Light-roasted beans tend to grind into clumpier, more static-prone piles than dark roasts, so the stir matters more, not less.
Symptom: Sour on the Front, Bitter on the Back, Every Time
What you taste: the shot starts with a sharp, almost citric bite and finishes with a dry, ashy or woody aftertaste. Increasing or decreasing the grind takes you from one problem to the other without landing in between.
Likely cause: uneven density across the puck — one region denser than another. Water channels through the loose side (fast, sour, under-extracted) while the dense side barely extracts (slow, bitter, over-extracted).
The fixes:
- Level the bed before you tamp. This is the single biggest lever. Look at the coffee in the basket from the side — is the surface roughly flat, or does it slope? If it slopes, you are setting up a density gradient before the tamper even touches it.
- Confirm the tamp is flat, not tilted. Rest the tamper on the coffee and look at the gap between tamper edge and basket rim. It should be even all the way around. A tilted tamp is the most common cause of the simultaneous-sour-and-bitter profile.
- Check the basket is properly seated. A basket that is not fully pressed into the portafilter can sit fractionally off-level, and no tamp will correct that.
Symptom: Water Leaks Around the Group Head During Extraction
What you see: espresso or water escaping from the rim of the portafilter where it meets the group head, dripping down the machine. The puck may also come out with a dent or depression in it after the shot.
Likely cause: the puck is touching the shower screen before extraction begins. This usually means the dose is too large for the basket, or the grind is too fine and the coffee expands into the screen as it wets. The screen presses into the puck and disrupts the surface.
The fixes:
- Reduce the dose by a gram or two and pull a shot. If the leak stops, you were overdosing the basket.
- Test with the “coin trick.” Place a coin on the surface of the tamped puck, lock the portafilter in without pulling a shot, then remove it. If the coin is pushed into the puck, there is not enough clearance between coffee and shower screen.
- Grind slightly coarser if a reduced dose still touches the screen. Finer grinds bloom and expand more as they absorb water.
Symptom: Puck Comes Out Sludgy, with a Dimple or a Hole
What you see: after the shot, the puck looks wet and soupy on top, sometimes with a visible depression, crater, or small hole where water punched through.
Likely cause: a crater or hole means channeling — the water eroded the grounds at a specific point and found a path down the side or through the middle. The sludgy surface can be from too little coffee (a thin puck is easy to disturb), a grind that is too coarse for the basket, or simply a puck that was never tamped with enough firmness to hold together.
The fixes:
- Check your dose against the basket’s rated capacity. A common error is underfilling, which leaves a thin, wet, unsettled puck that cannot resist water pressure evenly. Add a gram and re-check.
- Add a small amount of firmness to the tamp. A puck that crumbles or slumps after the shot was likely under-tamped. Aim for level and firm, not gentle.
- Do not chase firmness with brute force. More pressure beyond a moderate, consistent push does not fix an uneven puck. Level first, firm second.
Quick Reference: Symptom, Cause, Fix
| What you observe | Most likely cause | First thing to change |
|---|---|---|
| Flow fast, pale, under 25 seconds | Crack in puck from angled tamp lift or very fresh beans | Lift tamper vertically; rest beans 5–7 days post-roast |
| Sideways spray or spritzing | Clumps or voids not broken up before tamp | Stir grounds full-depth before tamping |
| Sour front, bitter back | Uneven puck density across the basket | Level the bed before tamping; check tamp is flat |
| Water leaking at group head | Puck touches shower screen | Reduce dose by 1–2 g; grind slightly coarser |
| Wet puck with a hole or crater | Channeling through one point | Check dose; increase tamp firmness |
| Sludgy or soupy puck top | Underfilled basket or too-coarse grind | Add 1 g to dose; tighten grind |
The Prep Sequence That Prevents Most of This
Every mistake above is easier to prevent than to correct. Here is the puck prep sequence in order, with the specific thing to watch at each step.
1. Weigh and grind directly into the basket. Weighing beans first avoids retention error. Grinding into the basket rather than a cup reduces handling — every transfer pours grounds, and pouring settles them unevenly.
2. Break up clumps with a full-depth stir. A short stir at the surface does not reach the clumps at the bottom. Reach the very bottom of the basket. You are looking for a loose, even, “fluffy” texture, not a compacted one.
3. Level the bed before tamping. This is the step most beginners skip and the one that matters most for preventing density gradients. A distribution tool that rests on the basket rim and levels as it sweeps works well; a careful finger-level or gentle tap on the counter also works, though the counter tap is the least consistent of the options.
4. Tamp level, firm, and straight up. Rest the tamper, confirm the gap around the rim is even, press down until resistance stops increasing, then lift straight up. No twisting required, though a light polish is harmless.
5. Check clearance before locking in. If the dose is close to the basket’s capacity, a quick coin check confirms the puck is not touching the shower screen. This takes seconds and prevents a set of problems you would otherwise not understand.
When the Problem Is Not Puck Prep
Not every channeling issue is a prep mistake. Three equipment or input factors cause channeling that no amount of careful tamping will fix:
- A dull or inconsistent grinder. A grinder that produces a wide spread of particle sizes (fines and boulders) creates uneven density in the puck no matter how well you distribute. If your grind looks like a mix of powder and grit, the puck will channel. This is the most common non-prep cause.
- A basket that does not sit flat. A warped or improperly seated basket creates a fixed tilt that no tamp can correct.
- A shower screen with uneven flow. If water enters the puck from one side more aggressively than the other, the puck will channel even if it was perfect before the shot. A shower screen that looks partially clogged or spray-patterned is worth cleaning or replacing.
If you have worked through the symptom table carefully and the issue persists, look at the grinder first. It is the piece of equipment most responsible for what a puck can and cannot do.
A Short Diagnostic Loop
Run it once per new bag of coffee, and any time a good-tasting shot suddenly turns sour-and-bitter.
- Pull a shot with your current settings.
- Check the puck after: is it level and solid, or is there a hole, crater, or sludgy top?
- Check the flow: fast, slow, or scattered?
- Match what you see to the table above and change one puck prep variable.
- Pull again.
The goal is not a perfectly clean puck every single time — some coffees, especially very fresh or very light ones, resist clean pucks no matter what you do. The goal is a repeatable sequence that removes the prep mistakes from the equation, so that when a shot misbehaves you know it is the coffee or the grinder talking, not you.
If you have already leveled, stirred, and tamped carefully and the shot still sprays, describe what the puck looks like after the shot and which direction the flow went sideways — that pair of details narrows down the cause faster than almost anything else.
Related guides: How to Pull Your First Espresso Shot: A Beginner’s Step-by-Step Tutorial, Espresso Tamping Technique: Step-by-Step Guide for Beginners, and Espresso Troubleshooting Flowchart: Diagnosing Shots by Taste and Time.